For those who aren't in the know about Impulse or Convolution reverbs, they take a "snapshot" of the ambience of a room or other space (or even audio equipment) that can then be used within a specialised reverb plug-in. (eg Space Designer, Altiverb, Waves IR1, TL Space, Voxengo Pristine Space, SIR, Nebula)
This gives a scarily accurate reproduction of the space, but it does have it's down sides as well.
It's very heavy on processing power - every bit of each impulse sample has to be processed against every single bit of each audio sample you're putting through it. For 24 bit source and 24 bit impulse that's 24x24=576 calculations for EACH sample. This means impulse reverbs not only suck the power from your computer's CPU, they also have a high latency - and no sound comes out of the other end of the reverb until the first sample gets processed through ALL the samples in the entire impulse. This means if you change a parameter in the reverb plug-in, there's quite a delay before you hear the effect.
Anyway - enough of the scary maths, let's talk about how to actually make your own impulse "recordings" of rooms. I'm going to focus on using Space Designer in Logic Pro, because Apple have very kindly created an Impulse Utility that makes the whole process stupidly easy - even for making surround-sound impulses if you feel the need.
What we're going to do:
We're going to play a swept tone into a room, record it through a couple of microphones, trim the resulting file and finally deconvolve it into your beautiful reverb patch.
Note: Grabbing responses from equipment is better with a single-full-volume sample "click" rather than a sweep, but a sweep is usually better for spaces because it has better frequency response, and better record levels - watch out for items resonating in the room though!
What we're going to need:
- A Mac computer with Impulse Utility. A laptop is the most convenient.
- Good quality audio interface with Mic preamps. With phantom power for the mics.
- Powered full-range speaker - to feed the swept tone into the room. Bigger is better so you can generate the lowest frequencies and it can fill the room with sound without distorting.
- At least one good quality microphone - a stereo pair of small-diaphragm condensers is ideal.
Setting up:
The first thing is to set the correct input/output devices.

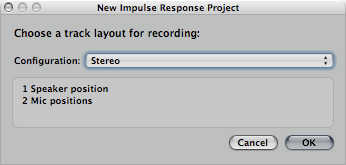
Then decide how many channels you want to record - I'm just using "Stereo" since I'm only using one source speaker (True Stereo is for two speakers/two mics).
Choosing the positioning of the mics and speaker/s is a whole book in itself, but as a starter I recommend you have the speaker next to you at one end of the room (pointing into it), and put the mics two-thirds of the way back, pointing away from the speaker. This avoids direct sound from the source in your reverb patch - giving more room colour. Feel free to record a whole bunch of different combinations if you have the time - there's no right or wrong.
Then you have to send some tone to your speaker to set the playback level. Press the tone button, adjust levels as fast as possible before the tone drives you crazy.

Recording the file:
Arm your track/s. (You could theoretically record each track at different times, for example if you had only one good mic).

You can set the expected reverb time for the capture - it gets added on at the end of your sweep.
Be very quiet. Shhhh.
Hit the Sweep button. (Where does your hearing cut out on the tone sweep?)
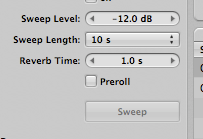
Voila! The Impulse Utility forces you to save the session/captured file now, so you could always finish this later if you have to quickly pack up and escape.
Trimming the resulting impulse:
You'll probably need to trim the silence from the start and end of the impulse file - you'll want a tightly-edited front, and why waste CPU cycles processing any silence at the end?
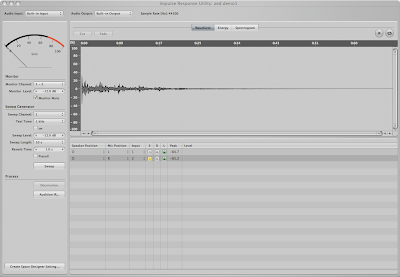
I recommend you do a fade into silence at the end.
Hardly-know factoid: One of the benefits of trimming the beginning of the impulse file, from a swept tone rather than a click, is that it removes any harmonic distortion that was generated during the process of playing the swept tone. The distortion conveniently ends up BEFORE the impulse click. Awesome.
Auditioning the Impulse:
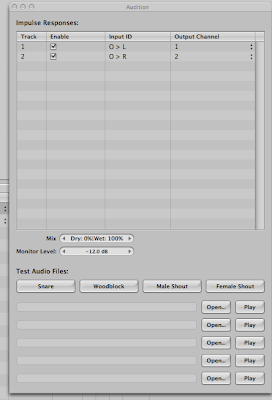
Pressing the Audition IR button will allow you to play some preloaded sounds (or you can load your own waves) through your new reverb to see what it sounds like before saving it as a patch.
Exporting as a Space Designer patch:
Hit the Create Space Designer Setting button, name your patch, done!

It magically appears in your Space Designer patch list.
Once you've been through this process once, you'll see just how easy it really is, and you'll probably start noticing the reverb sound in stairwells a lot more.
No comments:
Post a Comment