 |
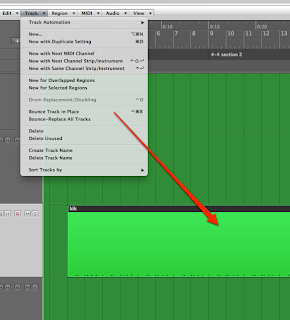
| Bounce Track in Place |
|
|
|
Here's 8 of my top features in Logic pro 9. If you have any others - feel free to comment!
Click on the pictures for larger versions.
8 Bounce-in-place, for either track or region. Bounces down either your audio instrument MIDI regions or your audio regions - with or without plugins - to new audio regions and then mutes the original track or region. Great for rapidly "printing" any special processing or pitch-fixing plug-ins like Melodyne into a solid file. Note you can also do this for EVERY track simultaneously should you wish to export all your tracks into a different DAW program for mixing or something. Closely related to...
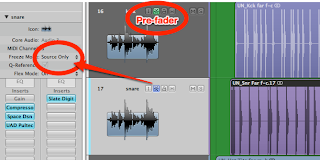 |
| Freeze Track - the Two Modes |
7 Freeze Track - you can freeze a track either just after the instrument (or less-usefully after an audio file I suppose), or after all the plug-ins and the fader, depending on how much load you want to take off the processor and how much control you want over tweaking plug-ins. Basically it does a cunning invisible 32-bit float bounce of the track (which you can go and copy from its folder if necessary) and then disables plug-ins/instruments on that track - in other words swapping processor power for hard-disk speed. It still sounds exactly the same but now you have more CPU power to do stuff. You can still un-tick the freeze button at any time to do some editing etc. Essential when you inevitably have so many plug-ins and instruments in your project that it won't play!
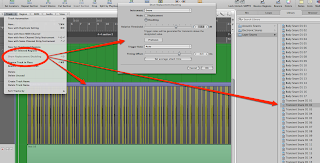 |
| Replacing or Layering Drum Track |
6 Replace or layer individual drum tracks - need to fix up or bolster those poorly-recorded kicks, snares or toms? Logic can automatically detect the drum hits on an audio track (you can adjust sensitivity), then you can choose a replacement (or layered) drum sample which is then automatically imported into a new EXS24 sampler which is placed underneath the original track with a handy MIDI trigger region to play it.
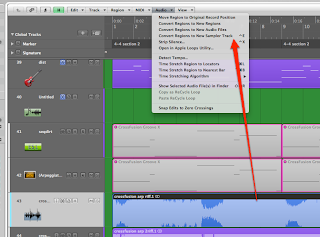 |
| Convert Audio Region to Sampler |
|
5 Convert to sampler - this is cool and ridiculously easy. You can either select a strip-silenced bunch of audio regions on a track, or you can let Logic identify the transients in the audio region/s, then it will automatically pack all those audio chunks into a sampler assigned to MIDI notes ready to play. And then mute the original audio regions. Oh, and it conveniently creates a MIDI region that plays those samples exactly as if they were still the original audio files - so it recreates the source audio exactly. You can delete this if you want to do something different.
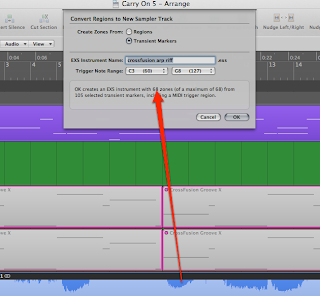 |
| Select Sampler Options |
 |
| Final Converted Sampler Track with MIDI region |
 |
| Making Groove Template from MIDI Region |
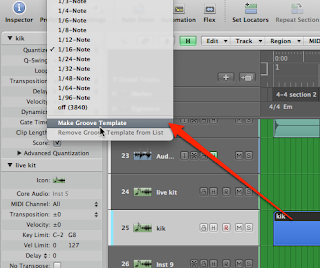
4 Create your own grooves, or match your MIDI stuff to live drums. You can do this in a few ways - using the "Audio-to-MIDI" groove template under "Factory" in the Sample Editor window, or recording a MIDI track while you tap along with every 8th or 16th note on a MIDI keyboard, or use the drum/replacement doubling trick above. Once you have a MIDI file, select it and go to the region inspector pane, click on the "Quantize" drop-down menu and select "Make Groove Template". This can then be applied to any other MIDI or Audio regions.
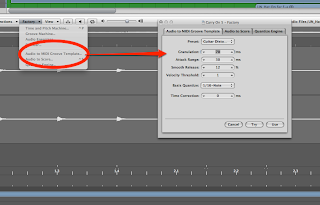 |
| Audio to MIDI Groove Template |
 |
| Region Gain |
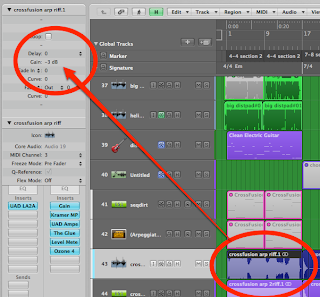
3 Region Gain - many users of Logic still don't know you can use the little region inspector panel top left of the Arrange window to adjust the individual gain for each audio region. It can replace the use of automation in some cases - just cut up your regions and set the gain for each one. It handily does this before it goes through any plug-ins in the channel strip (although this can be a problem if you have compressors inserted and you're trying to use it instead of automation - the compressor may "fight" any gain changes).
 |
| Capture Record Button |
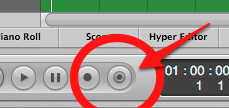
2 Capture Record. This mysterious little button is like magic. Say you're just been jamming along on your MIDI keyboard or controller in Logic, then you realise you've just played something absolutely amazing, but "oh no!" you haven't been recording!
Fear not, just press this little button and what you just played will magically appear as recorded. If the button doesn't show up for you - Ctrl-Click on your Transport bar and add it.
Tip - use "Take Folder" mode for your MIDI cycle recording - even more useful.
NB: This doesn't work with audio unfortunately - unless you use the sneaky "Punch-on-the-fly" mode trick. When "Punch on the Fly" mode is selected under the Audio menu, Logic is ALWAYS recording any armed audio tracks whilst playing-back. You just need to actually hit "record" for a second
while it's still playing to let Logic know you want to capture and hence retrospectively grab what you just played.
 |
| Take Folder |
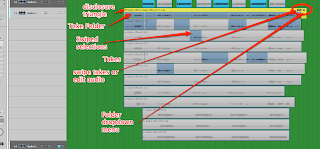
1 Take Folders. Most people know about this one but it still bears mentioning. Record while in cycle mode, then just swipe the bits you want to keep from each take. It's a fantastic way to get great vocal takes and Apple really has this one nailed better than the competitors. Many people aren't aware of all of its cool features though.
Some additional tricks are; creating alternate versions of your comp (good for backing vocals or doubling lead vocals), exporting particular comps to duplicate tracks, editing the audio itself (eg trimming or moving parts) while comp'ing a good take, tagging the best bits as you go, or editing the size of the looped section (and folder) if it chops off the beginning of the loop each time.
You can also manually create a take folder out of various selected audio regions for creative purposes and you can also cut the take folder into chunks if needed.
What are your favourites?


